Unlock with Biometrics
PassageWay can be configured to accept biometrics as a method to unlock your Vault.
Biometrics can only be used to unlock your Vault, you will still be required to use your Master Password and any enabled Two-step Login method when you log in. If you’re not sure of the difference, scroll down to Understanding Unlock vs. Log In.
Tip
Biometric features are part of the built-in security in your device and/or operating system. PassageWay leverages native APIs to perform this validation, and therefore PassageWay does not receive any biometrics information from the device.
Enable Unlock with Biometrics
Unlock with Biometrics can be enabled for Bitwarden on Mobile, Desktop, and Browser Extensions:
Enable for Mobile
Unlock with Biometrics is supported for Android (Google Play or FDroid) via fingerprint unlock or face unlock, and for iOS via Touch ID and Face ID.
To enable Unlock with Biometrics for your Mobile device:
- In your device’s native settings (e.g. the iOS Settings app), make sure your biometric method is turned on.
- In your PassageWay app, open the Settings tab.
- Scroll down to the Security section and tap the biometrics option you want to enable. What’s available on this screen is determined by your device’s hardware capabilities and what you’ve enabled (Step 1), for example:

Tapping the option should prompt you to input your biometric (i.e. face or thumb-print). A green Enabled status indicator (pictured above) will indicate when Unlock with Biometrics is successfully enabled.
Enable for Desktop
Unlock with Biometrics is supported for Windows via Windows Hello using PIN, Facial Recognition, or other hardware that meets Windows Hello biometric requirements and for macOS via Touch ID.
To enable Unlock with Biometrics for your Desktop app:
-
In your device’s native settings (e.g. the macOS System Preferences app), make sure your biometric method is turned on.
Tip
Windows Users may need to install the Microsoft Visual C++ Redistributable before Windows Hello can be turned on in Desktop Preferences.
- In your PassageWay app, open your Settings (on Windows, File → Settings) (on macOS, PassageWay → Preferences).
-
Scroll down to the Security section and select the biometrics option you want to enable. What’s available on this screen is determined by your device’s hardware capabilities and what you’ve turned on (Step 1), for example:

Unlock with Windows Hello
Once enabled, the Desktop app will automatically prompt for your biometric method to unlock your Vault. You can turn off automatic-prompting from the same menu using the Do not prompt… option:

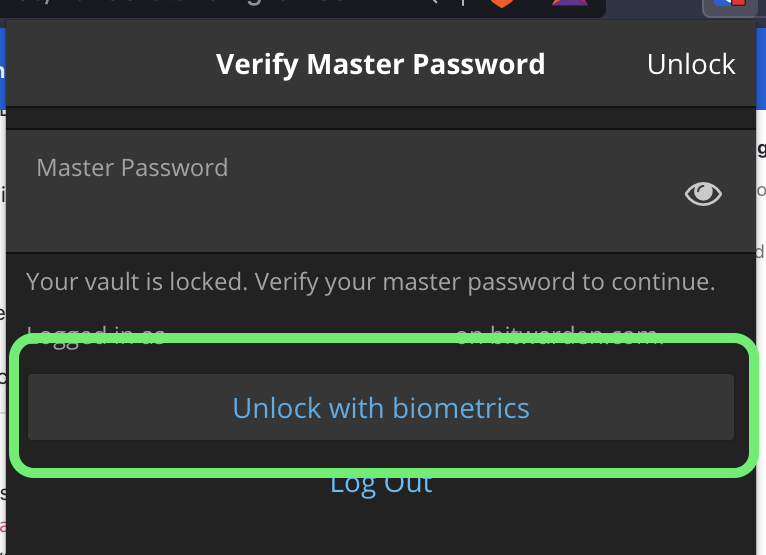
Regardless of your auto-prompt selection, a new button will be presented on the Unlock screen for unlocking your Vault:

About Biometrics in Browser Extensions
Unlock with Biometrics is supported for Extensions through an integration with the PassageWay Desktop app. In practical terms, this means:
- For all Browser Extensions, you will need to enable Unlock with Biometrics in Desktop before proceeding. For all except Safari, the PassageWay Desktop app must be logged in and running in order to use Unlock with Biometrics for a Browser Extension.
- Browser Extensions support the same biometrics options as Desktop; for Windows via Windows Hello using PIN, Facial Recognition, or other hardware that meets Windows Hello biometric requirements and for macOS via Touch ID.
Two things to bear in mind before enabling the integration are Permissions and Supportability, documented below:
Permissions
To facilitate this integration, browser extensions except Safari will ask you to accept a new permission for PassageWay to communicate with cooperating native applications. This permission is safe, but optional, and will enable the integration that is required to enable Unlock with Biometrics.
Declining this permission will allow you to use the Browser Extension as normal, without Unlock with Biometrics functionality.
Supportability
Unlock with Biometrics is supported for Extensions on Chromium-based browsers (Chrome, Edge, Opera, Brave, etc.), Firefox 87+, and Safari 14+. Unlock with Biometrics is currently not supported for:
- Firefox ESR (Firefox v87+ will work).
- Microsoft App Store Desktop Apps (a side-loaded Windows Desktop App, available at bitwarden.com/download will work fine).
- Side-loaded MacOS Desktop Apps (an App Store Desktop app will work fine).
Enable for Browser Extensions
To enable Unlock with Biometrics for your Browser Extension:
Tip
Biometrics (Windows Hello or Touch Id) must be enabled in your Desktop App before proceeding. IIf you don’t see the Windows Hello option in your Desktop app, you may need to install the Microsoft Visual C++ Redistributable. Additionally, if you’re using Safari, you can skip straight to Step 4.
- In your PassageWay Desktop app, navigate to Settings (on Windows, File → Settings) (on macOS, PassageWay → Preferences).
-
Scroll down to the Options section, and check the Enable Browser Integration box.
Note
Optionally, check the Require verification for browser integration option to require account fingerprint verification when you activate the integration.
-
In your Browser, navigate to the Extensions manager (e.g.
chrome://extensionsorbrave://extensions), open PassageWay, and toggle the Allow access to file URLs option.Not all browsers will require this to be toggled on, so feel free to skip this step and circle back to it only if the remaining procedure doesn’t work.
- In your Browser Extension, open the Settings tab.
-
Scroll down to the Security section and check the Unlock with biometrics box.
Tip
You may be prompted at this stage to allow PassageWay to
communicate with cooperating native applications. This permission is safe, but optional and solely enables the Browser Extension to communicate with Desktop as described above.You should be prompted by your Desktop app to input your biometric. Doing so will complete the initial setup procedure. If you’ve opted to require verification (Step 2), you’ll need to approve a fingerprint validation check.
Once enabled, a new button will be presented on the Unlock screen:
Tip
Your Desktop app needs to be Logged In but does not need to be Unlocked to unlock a Browser Extension with biometrics.
Understanding Unlock vs. Log In
In order to understand why unlocking and logging in aren’t the same, it’s important to remember that PassageWay never stores unencrypted data on its servers. When your Vault is neither unlocked nor logged in, your Vault data only exists on the server in its encrypted form.
Logging in to PassageWay decrypts your Vault data to your device. In practice, that means two things:
- Logging in will always require your Master Password, because your Master Password is the source of the key needed to decrypt your Vault data. Additionally, because decryption is an operation that needs to be protected, this stage is where any enabled Two-step Login methods would be required.
- Logging in will always require you to be connected to the server, because you need access to the encrypted Vault in order to decrypt it.
Unlocking can only be done when you’re already logged in. In other words, only when your Vault data is already stored (encrypted) on your device. Because your Vault is already downloaded and your decryption key stored in memory:
- You don’t need the decryption key derived from your Master Password, so you’re free to use other access methods, like PIN codes and biometrics.
- You don’t need to be connected to the server.